Note: Only administrators can enter non-PO invoices manually.
Ideally, every invoice arriving with your organisation from suppliers will have a PO number or an IDN.
However, there may be exceptions where you have to enter a non-PO invoice manually.
For example:
•In cases of small and occasional suppliers, where it's the most practical option
•Where payments need to be made (for example, through grants) to organisations or people who are not technically suppliers*
Note: *To keep things simple, we refer to these groups or individuals as 'suppliers' in this guide as the process is the same.
In either case, you must first set up an IDN for the supplier.
Important: After doing this, make a hand-written note of the supplier name and their IDN. You'll need them in a few moments.
To get started with the non-PO invoice, select the menu options E-Invoicing and then Non-PO Invoice.

The Non-PO Invoice entry page then appears.
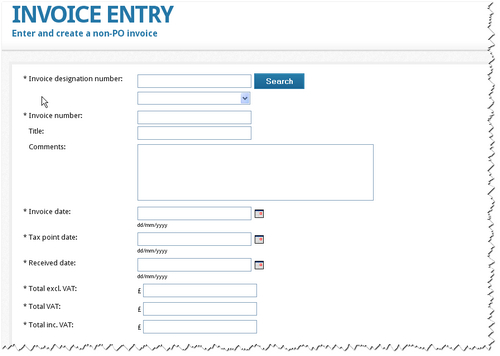
Note: This page looks similar to the PO Flip page but it contains a new field called Invoice designation number.
Let's look at each of these fields in order.
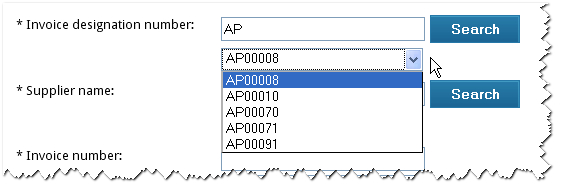
First, you need to find the Invoice designation number that will relate to your invoice.
Note: For more information about IDNs, see what are IDNs and how do they work?
Once you enter the prefix that's exclusive to your organisation (in our example, it's AP) and clicked on Search, then all possible IDNs will be listed in the drop-down menu. Choose the correct IDN.
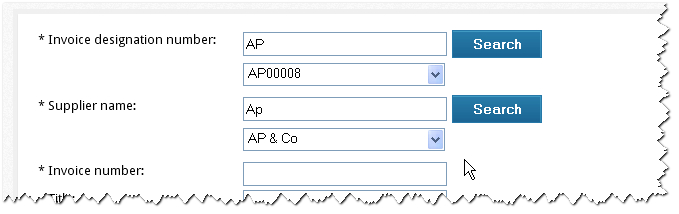
Now let's look for the Supplier name.
A couple of different things may happen next - depending on how the IDN was set up previously.
•If the IDN was linked exclusively to one supplier, then the supplier's name (and their VAT reg number) will appear automatically.
•If the IDN was linked a type of product or service (which can be applied to multiple suppliers) then you need find the supplier. Key in part of their name, click Search and then choose the supplier from the drop-down list. Their VAT reg number will appear automatically further down.
Invoice number: Copy and enter this from the invoice details supplied to you.
Title/comments: These are not mandatory. But add them if they are useful.
Dates: Copy and enter these from the invoice details supplied to you.
Next we'll look at the details and totals to enter. Here's the bottom of the page ...
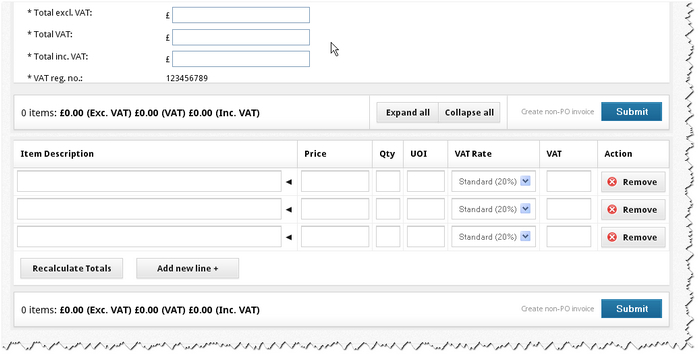
There are two options for completing the fields above:
•You can copy and enter the Totals/VAT fields from the invoice details supplied to you and then complete the Description/price/quality/VAT/Recalculate details beneath afterwards.
•Alternatively, you can enter the Description/price/quality/VAT/Recalculate details first - and then go back up to enter the totals in the Totals/VAT fields.
Whichever way you choose, both groups of fields must be completed.
Note: The triangle icons in the Item Description area open up more fields where you can add details such as hourly rates if you wish.
When all fields are completed, click either Submit button.
The following screen is then displayed.
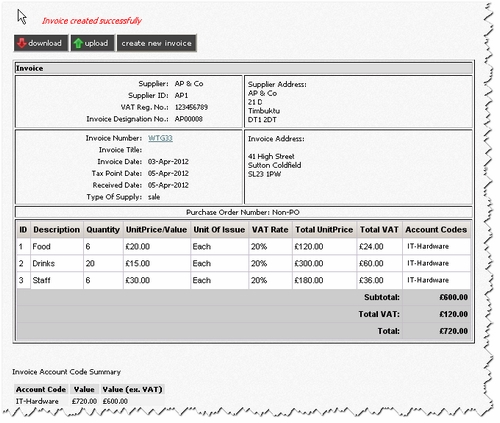
A message confirms your non-PO invoice has been created successfully.
The invoice details are displayed - with more details available if you scroll down the page.
The invoice has now been sent for onward processing.
Note: You can see its status in the queue by clicking on the menu options E-Invoicing and then Tasks.
However, there are more options open to you - if you need them.
If you wish, you can download a PDF copy of the invoice, upload the invoice manually to your finance system or create a new invoice.
Note: You'll see buttons for each of these above the invoice details.
If you suddenly realise you've assigned the wrong IDN to the invoice, then you can change the IDN to the correct one.
Copyright © Proactis Limited 2023. All rights reserved.